Shop Manager
The Shop Manager is in charge of managing the player's currency, displaying the different Game Actors (such as Game Characters and Game Items) that can be purchased.
It consists of different levels, in each of which the list of possible purchases varies. The next level is accessed by gaining experience, which is obtained by winning battles, or by exchanging for currency (using the Buy Exp button). The amount of experience gained and needed to level up is displayed in the UI, both as text and as a bar.
It will display a series of purchasable GameActors in the form of a panel, fully customizable. The amount displayed can be configured. Within the game, the displayed items can be exchanged for other items in exchange for currency (using the Refresh button).
The following fields can be modified to suit the needs of the game:
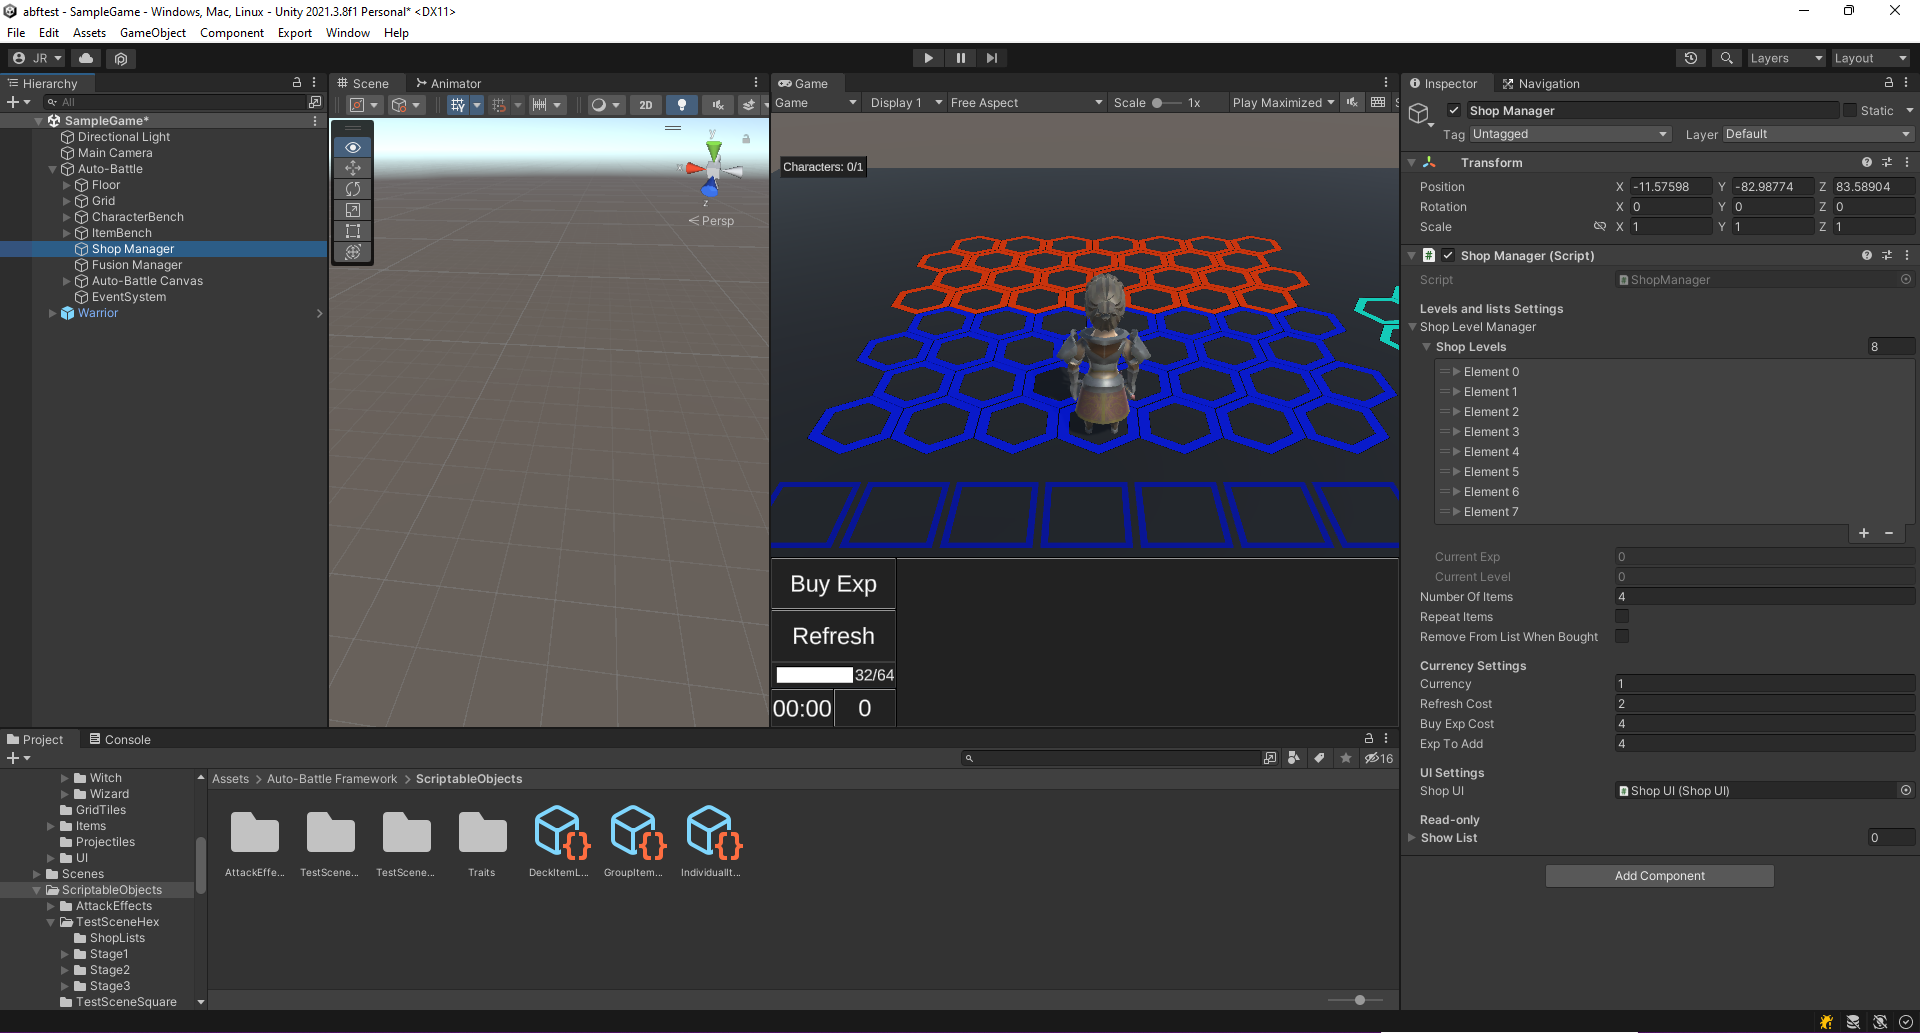
Shop Levels: List of store levels. Each level consists of an IShopList Scriptable Object, and a value required to go to the next level. How to create a list is taught in Create a Shopping List.
Number of items: Number of items to display in the shop.
Repeat items: When displaying items, items can be repeated.
Remove From List When Bought: When an item is purchased, it is removed from the Shop List.
Currency: Amount of currency the player has.
Refresh Cost: How much does it cost to refresh the shop.
Buy Exp Cost: How much does it cost to buy experience.
Exp To Add: How much experience to add when is bought.
 Inspector of Shop Manager.
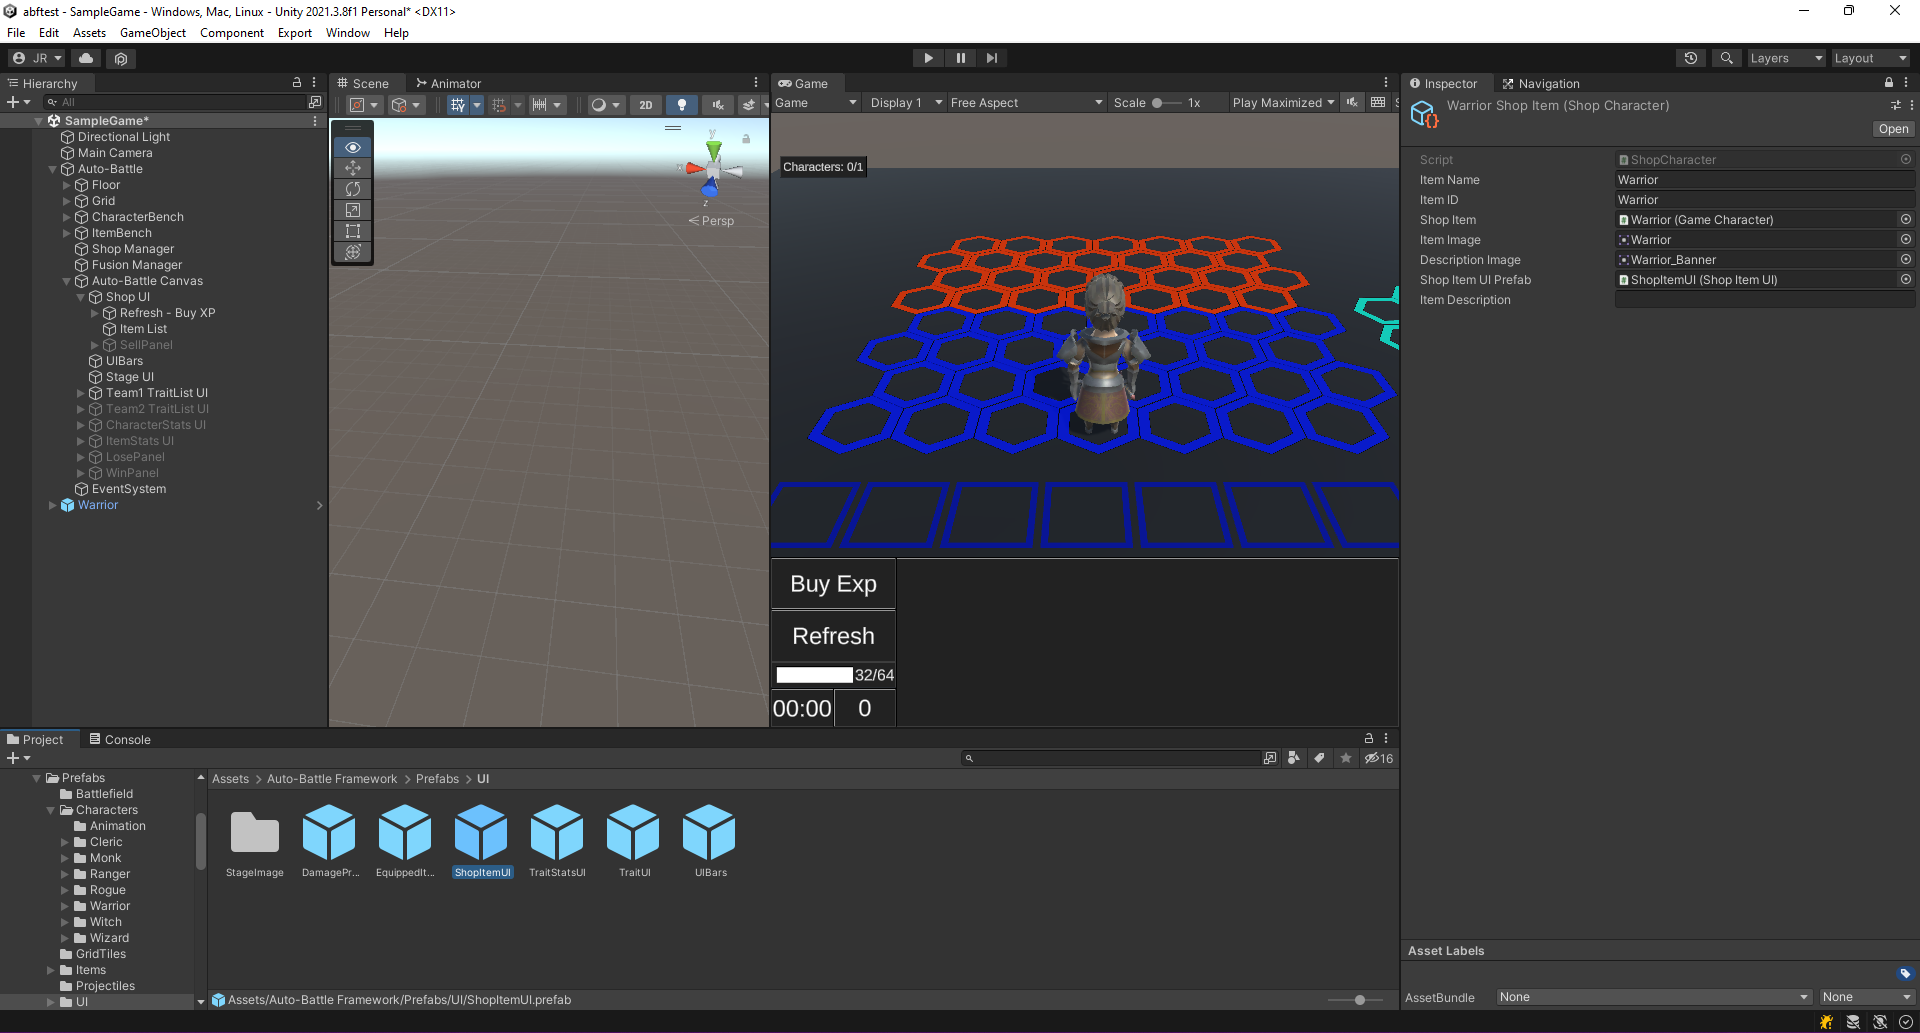
If you want to modify the shopping panel of an object, we recommend creating a duplicate of the ShopItemUI prefab (CTRL + D), found in "Auto-Battle Framework/Prefabs/UI/ShopItemUI", and modify the ShopItemUI duplicate without deleting any of its components. To use the modified duplicate, in the Scriptable Object ShopItemInfo of each created character and object attach the prefab in the Shop Item UI Prefab field.
 Directory of ShopItemUI. Attach it to any Shop Item UI Prefab.